
I have detailed the integration of the Chromebook into my daily workflow. I also previously posted an primer on getting up and started on your new Chromebook. In this earlier post, I indicated that at some point you might want to use Google Drive and upload all of your files to be able to work on them later. This blog post is all about that “later date” where you are finally ready to work in the cloud and want ubiquitous access to your files. This mindset usually happens when you recognize the power and freedom associated with using cloud computing tools like Google Apps, but want to find an easy way to integrate all of the old documents, papers, worksheets, and presentations that you’ve built and used over time. If you’re at this place…this post is for you. Keep in mind that there are multiple ways to upload and access your files to the cloud (e.g., Dropbox). I mostly use Google Drive since I use Google Apps and the Chromebook in my workflow.
Step One – Back that thing up!!!

The first step in moving to the cloud is to back up your files. Let’s face it, at some point your computer will crash. A good rule of thumb is to have three copies of all files…especially the files you cannot live without. This means that you have the original file on your computer, a local backup, and a backup in another location. This alternate location might be a family members house, file cabinet at work, etc. My advice is to purchase yourself an external hard drive. You can get a 2 terabyte (TB) external drive for around $100 on NewEgg, Amazon, WalMart, Staples, BestBuy, etc. I really love my Seagate portable, external hard drives. I can back up my MacBook, drop it in my bag, and bring it to work, bring it to a conference, etc. I also pay for online data backup of my entire family using Crashplan. This allows me to make sure I have multiple copies in multiple locations.
Step one, backing everything up first is mandatory. Go to the computer that contains all of the files you want to upload to Google Drive and back everything up. Just in case something goes wacky as you upload & download files into Google Drive, I want to make sure you have a back-up.
Step Two – Download Google Drive, and then download your files
Now that you have at least one backup of your files, go to Google Drive and sign in. On this page you should see all of your Google Docs and files shared via gMail. Now download Google Drive for your computer. When you install Google Drive it will ask you to sign in, and ask where on your computer you want to store all of your files. Just accept all of the standard locations and permissions that it calls for. After that, your files from the online version of Google Drive will now download to your computer. This may take some time depending on how many files you have in your Google Apps.

Step Three – Organize the files you’ll be uploading to Google Drive
While you’re waiting for your online files to download to your computer, take a look through the files on your computer and decide what you want to upload to Google Drive. Certain documents like tax forms and personal photos you might not want to upload. You may however chose to upload all of your PowerPoints for your Sociology class…or your worksheets for World History I. Decide which files you want to upload and organize these into folders. It’ll be much. much easier to make sense of your files before you upload them to Google Drive.

Step Four – Upload your files to Google Drive
After you’ve organized the files you’ll be uploading to Google Drive right click (control click on the Mac) and find out how much space this will all take. You have about 15 GB of storage available in Google Drive, but this is only an approximate. Google splits this up between photos, gMail, etc. Chances are, unless you’re uploading videos and music…you have around 5 to 10 GB of “stuff” that you want to upload. Keep in mind that if you have a Chromebook, you automatically get 100 GB of storage for free…for two years. The nice thing is that once you upload materials to Google Drive, they’re always in Google Drive.
Once you’re ready, copy the folder(s) that you want to upload to Google Drive…and paste it into the Google Drive folder on your computer. As soon as you paste the folder and included materials into Google Drive, it will automatically begin uploading them to the online version of Google Drive. Go get yourself a coffee.
It will take a long time to upload all of your files to Google Drive. Let the computer do the work. On the Mac and the PC you can click on the Google Drive icon to see how how the sync is progressing. It will let you know if there are any errors. Most of the errors will let you resync the files that had problems. After a bit of time all of your files will be uploaded to Google Drive. Any files that you move to this folder will now be uploaded to Google Drive. Any files or folders that you remove from this folder will also be removed from Google Drive.

Step Five – Convert your files to a Google document, spreadsheet, or presentation
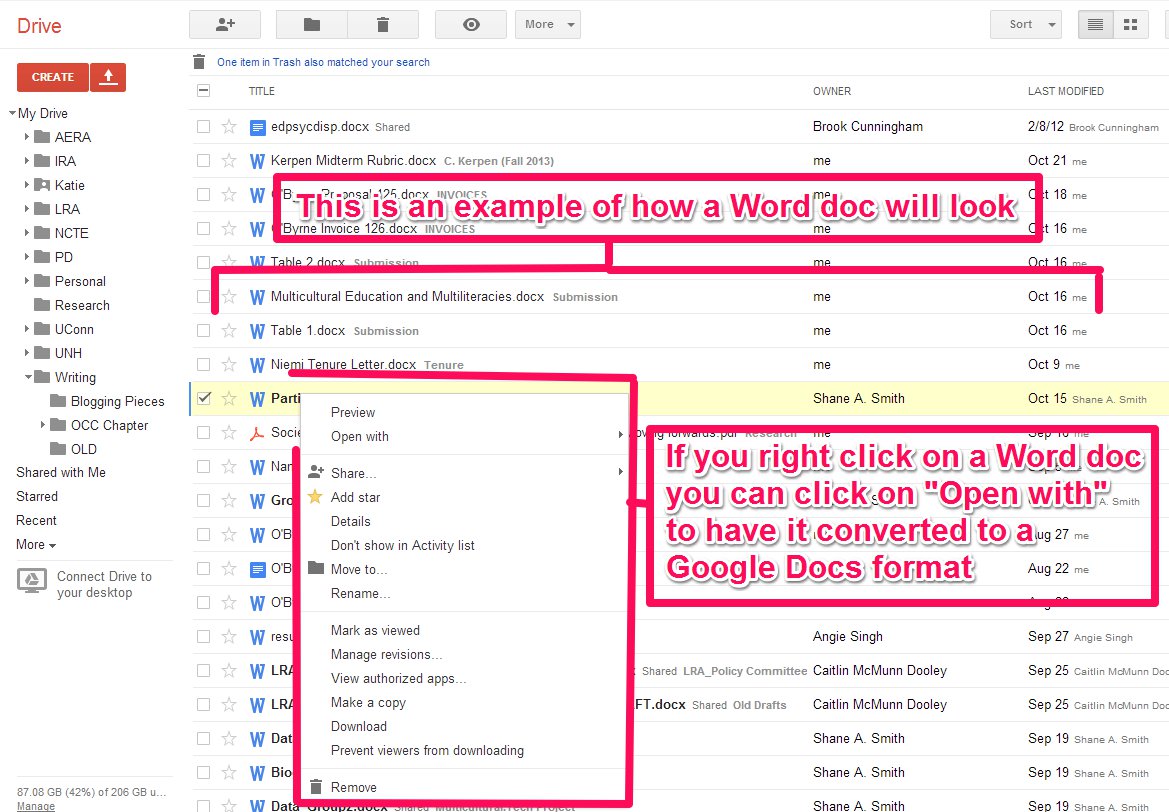
Once all of your files are uploaded to Google Drive you can now access them from your mobile device, tablet, computer, etc. The one challenge is that (for now) Google Drive doesn’t always automatically change your files to a Google Apps format. You can have it transfer them while uploading, but this doesn’t always work. If you have a Word doc, PPT, or Excel file that you want to change over to a Google Apps format you need to convert it online. The good news is that once you convert it to a Google Apps format, it takes up less space. Once you convert it over, you can delete the original version (.doc, .ppt, .xls, etc) if you’ll only be using the Google format from now on. You might have to do a little formatting…but now your word doc, PowerPoint, or Excel file should act like a Google document, spreadsheet, or presentation.
Step Six – Enjoy living and working in the cloud
Now that your files are online, you may chose to only work in Google Apps from now on. I made the decision to stop using Microsoft Office and I haven’t looked back. I have Google Drive installed on my Mac at work, my PC at home, and all of my devices. I can sign in on any of these and access my work. I love being able to start up a Google Doc at home and work on an article. Share the link to collaborators. Drive in to work and finish working on the document. Finally, I can also share the link for the documents online to allow others to review and comment on my work. Google Apps and Google Drive allows me to work across devices and platforms, all while ensuring that I always have access to my files.


Pingback: Safely Compute in the Cloud Using Google Drive ...